
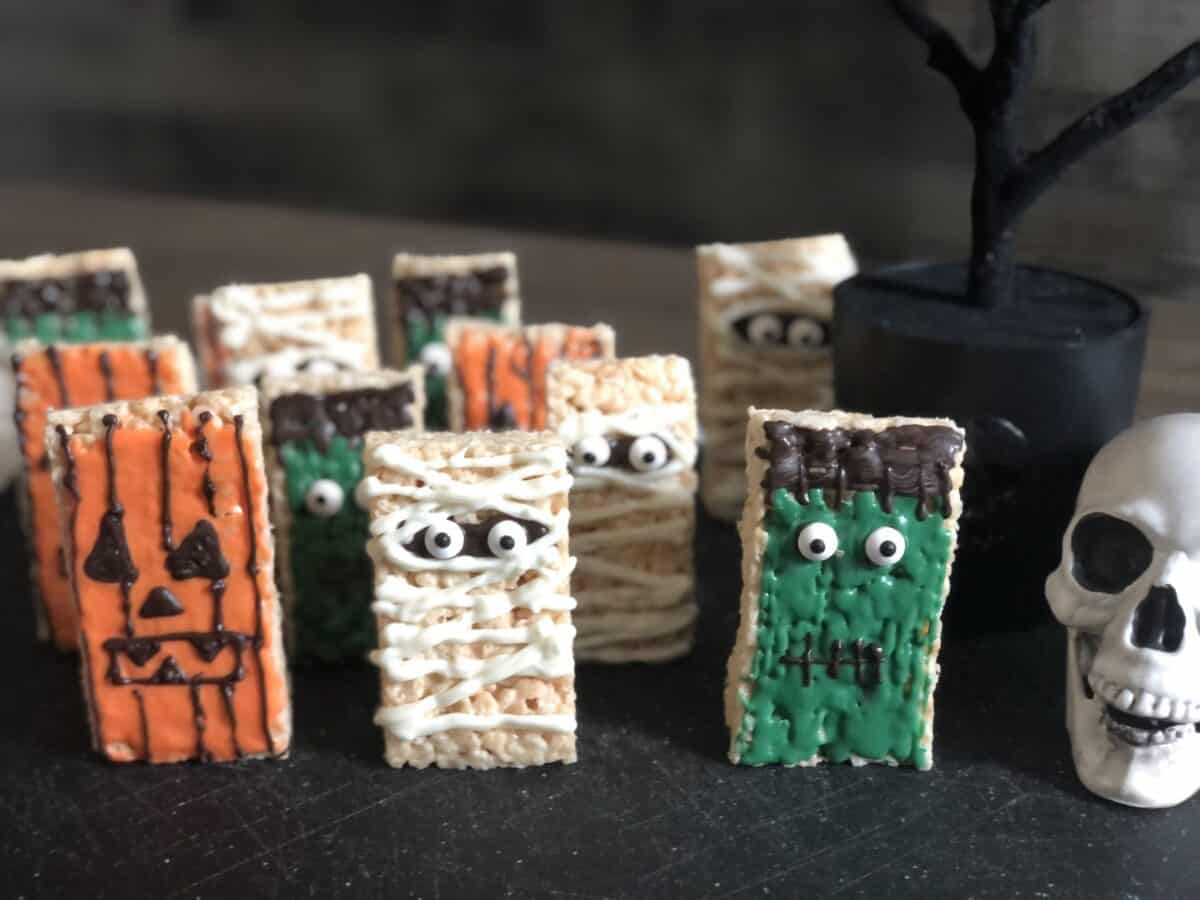
Halloween Rice Krispie Treats are sure to get you in the spooky spirit! These little monsters are super cute, but better than how good they look, they are so easy to make. If you are planning on throwing a great Halloween Party this year, homemade Rice Krispie treats are an absolute must.
This blog post contains affiliate links. As an Amazon Associate I may earn income from qualifying purchases. We also partner with Impact.com to offer affiliate links. Thanks for the support.
Why These Crispy Treats Are So Good
Everyone who wants to know how to make Rice Krispie treats already knows how. They have been around forever and the recipe is on both the Rice Krispie cereal box and bags of marshmallows. What I am going to suggest is more marshmallows. The typical recipe calls for 4 cups of marshmallows and 6 cups of Rice Krispies. I like to go with 5 cups of marshmallows.
Aside from the extra marshmallows, we are going to use chocolate, fun sprinkles, and a few extras to decorate these little cuties.
Making These Fun Treats and Festive Decorations
You guys know I need my confections to be forgiving and I don't do perfect. I barely do "exact." So aside from the tasty factor, I like making these because they are so simple you could have your kids do them and they will come out great! With the ingredients listed below, we can make characters or just fun toppings.
To make these three designs, you'll need:
- different colors of chocolate: orange, white, dark brown, purple, and green chocolate melts
- candy eyes
- disposable plastic piping bags
- oil based food coloring for chocolate (optional)
- festive halloween sprinkles
How to Easily Melt Chocolate
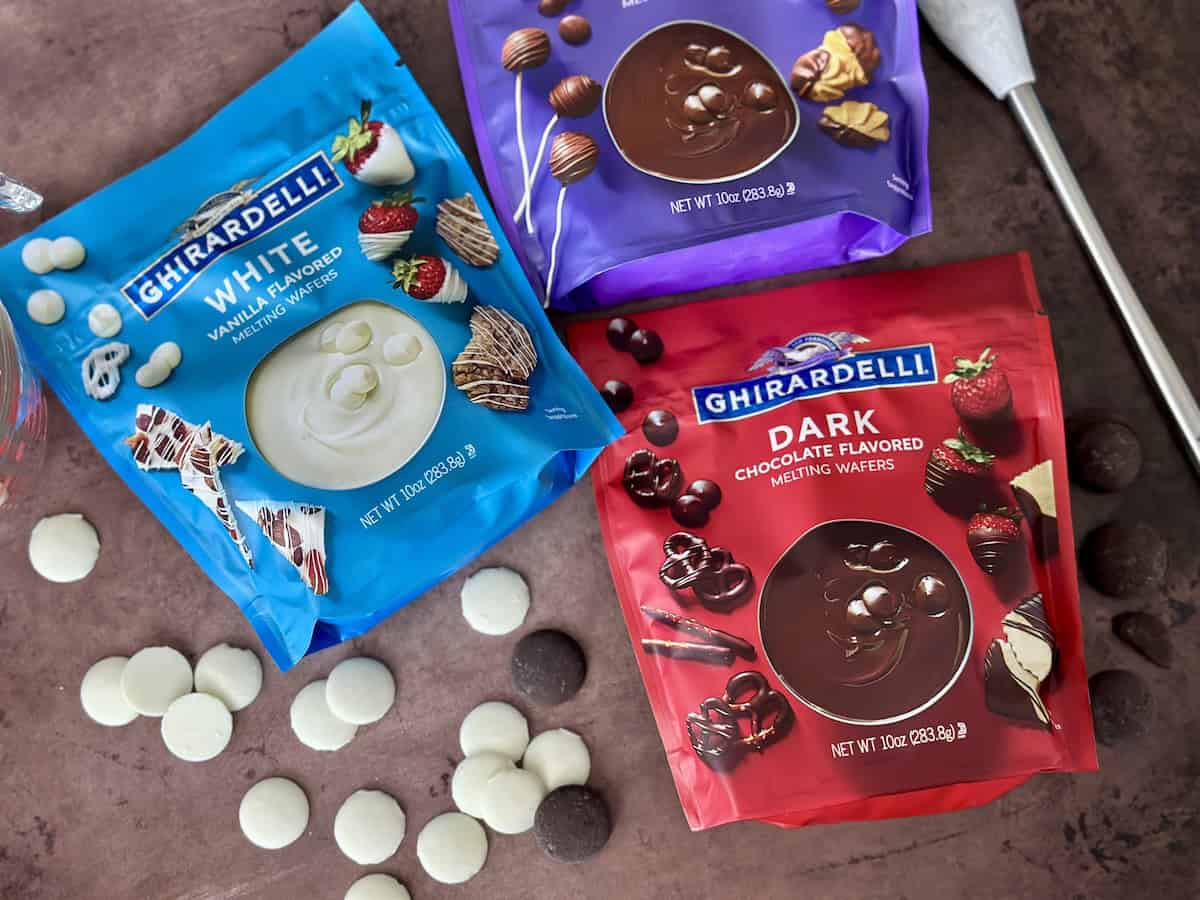
The most challenging part about making these is the chocolate. Use a microwave safe dish and the MELT setting on your microwave. You don't want the sugar in the chocolate to burn.
I have learned that is that lots of stirring makes all the difference. Really stir the chocolate between each interval to the microwave.
Ghirardelli melting wafers consistently melt the best and have the best flavor. I like to use some white wafers in my colored chocolates to help smooth out the consistency.
Helpful Confectioners Supplies

- Parchment Paper or Wax Paper
- Lollipop sticks - if you want to serve them standing up like lollipops
- Plastic disposable piping bags
- microwave safe bowls
- small spatulas- much easier to clean after stirring chocolate than spoons
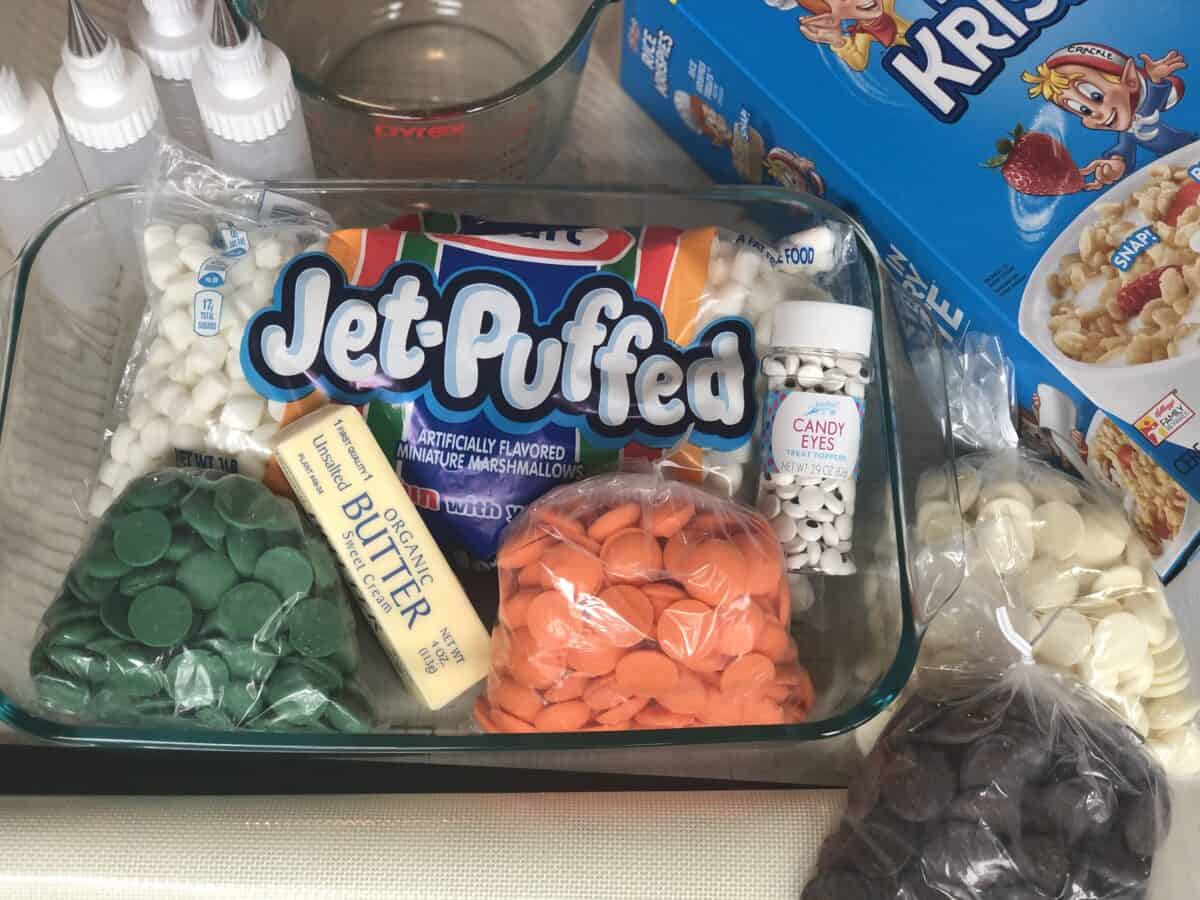
Basic Rice Krispie Treat Recipe

You only need need 3 basic ingredients: marshmallows, butter, and crispy rice cereal of course. Simply melt the butter in a large pot. Keep the heat on medium low and add your mini marshmallows. Stir those well and as soon as the marshmallows have completely melted, add the Rice Krispie cereal and stir it quickly.
Transfer that mixture to your prepared pan and press it together. The basics are done. Once these set up, you can cut them out and make so many festive halloween Rice Krispie treats.
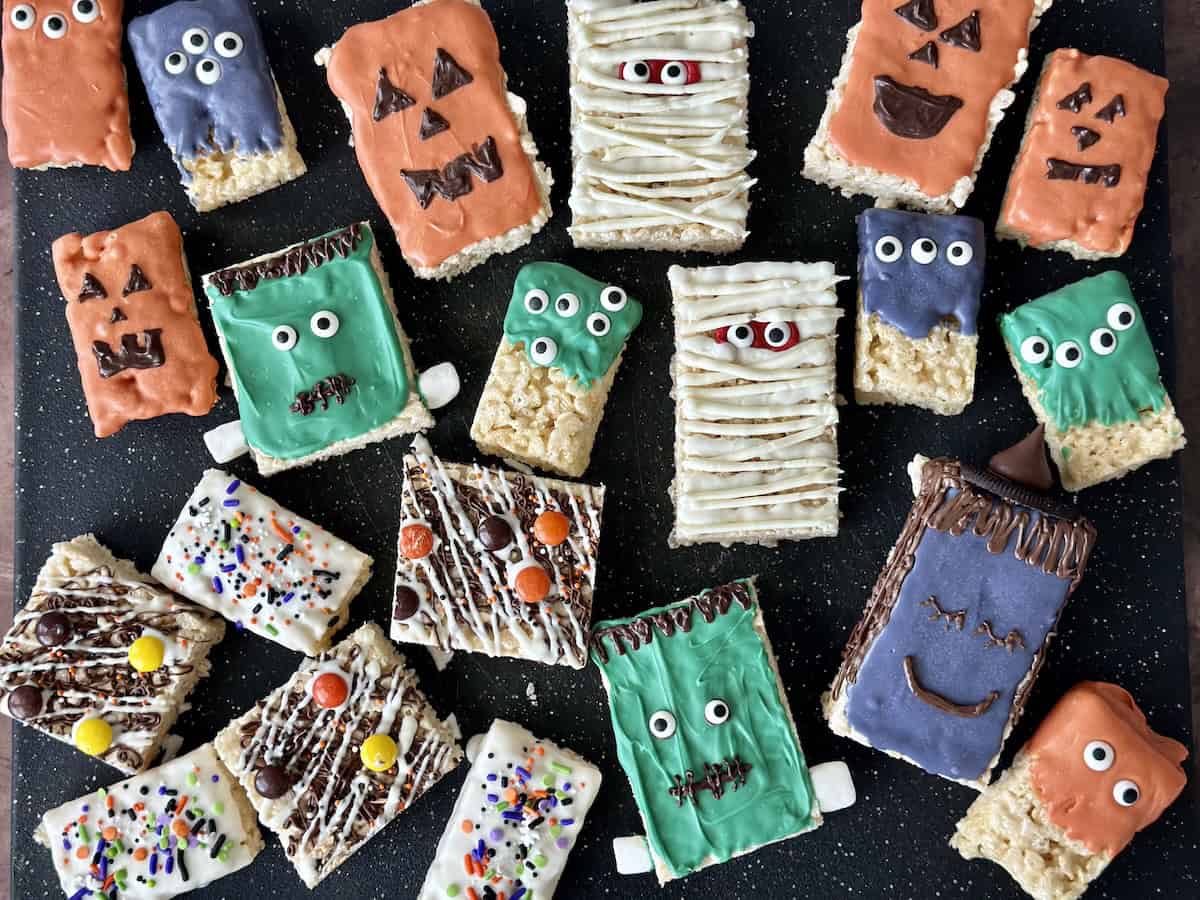
Jack-O-Lantern or Pumpkin Rice Krispie Treats

These fun halloween treats only require two colors of chocolate and are very easy to make. You can either cut the Krispy treats into squares or use a pumpkin shaped cookie cutter for the shapes.
Spread an even layer of orange chocolate on each Rice Krispie treat. Then using a piping bag and black candy melts or dark chocolate, pipe on the jack-o-lantern face.
Frankenstein Rice Krispie Treats

For this sweet treat, you will need a few different colors: green, purple, and dark chocolate plus a few candy eyes. Dip the Rice Krispie treat in melted green or purple chocolate and gently tap the bottom so the chocolate layer evens out. While the chocolate is still soft, press in the candy eyes. Then, using a piping bag, add dark chocolate for the hair and mouth.
Cute Little Mummy Rice Krispies Treats

These are a must have for my Halloween parties. They are very easy treats too. Just take a regular rice krispies treat and start by securing two candy eyes. Then drizzle with white stripes back and forth to make a wrapped mummy look. Make sure not to cover the eyes completely, but create that spooky wrapped eye.
Monster Rice Krispie Treats

If you are strapped for time, you can take a short cut with these. Unwrap store-bought Rice Krispies treats and dip in whatever fun colors you want for your different monster treats. Then use candy eyes in the middle and you have fun halloween Rice Krispies treats in a matter of minutes.
Scary Witches
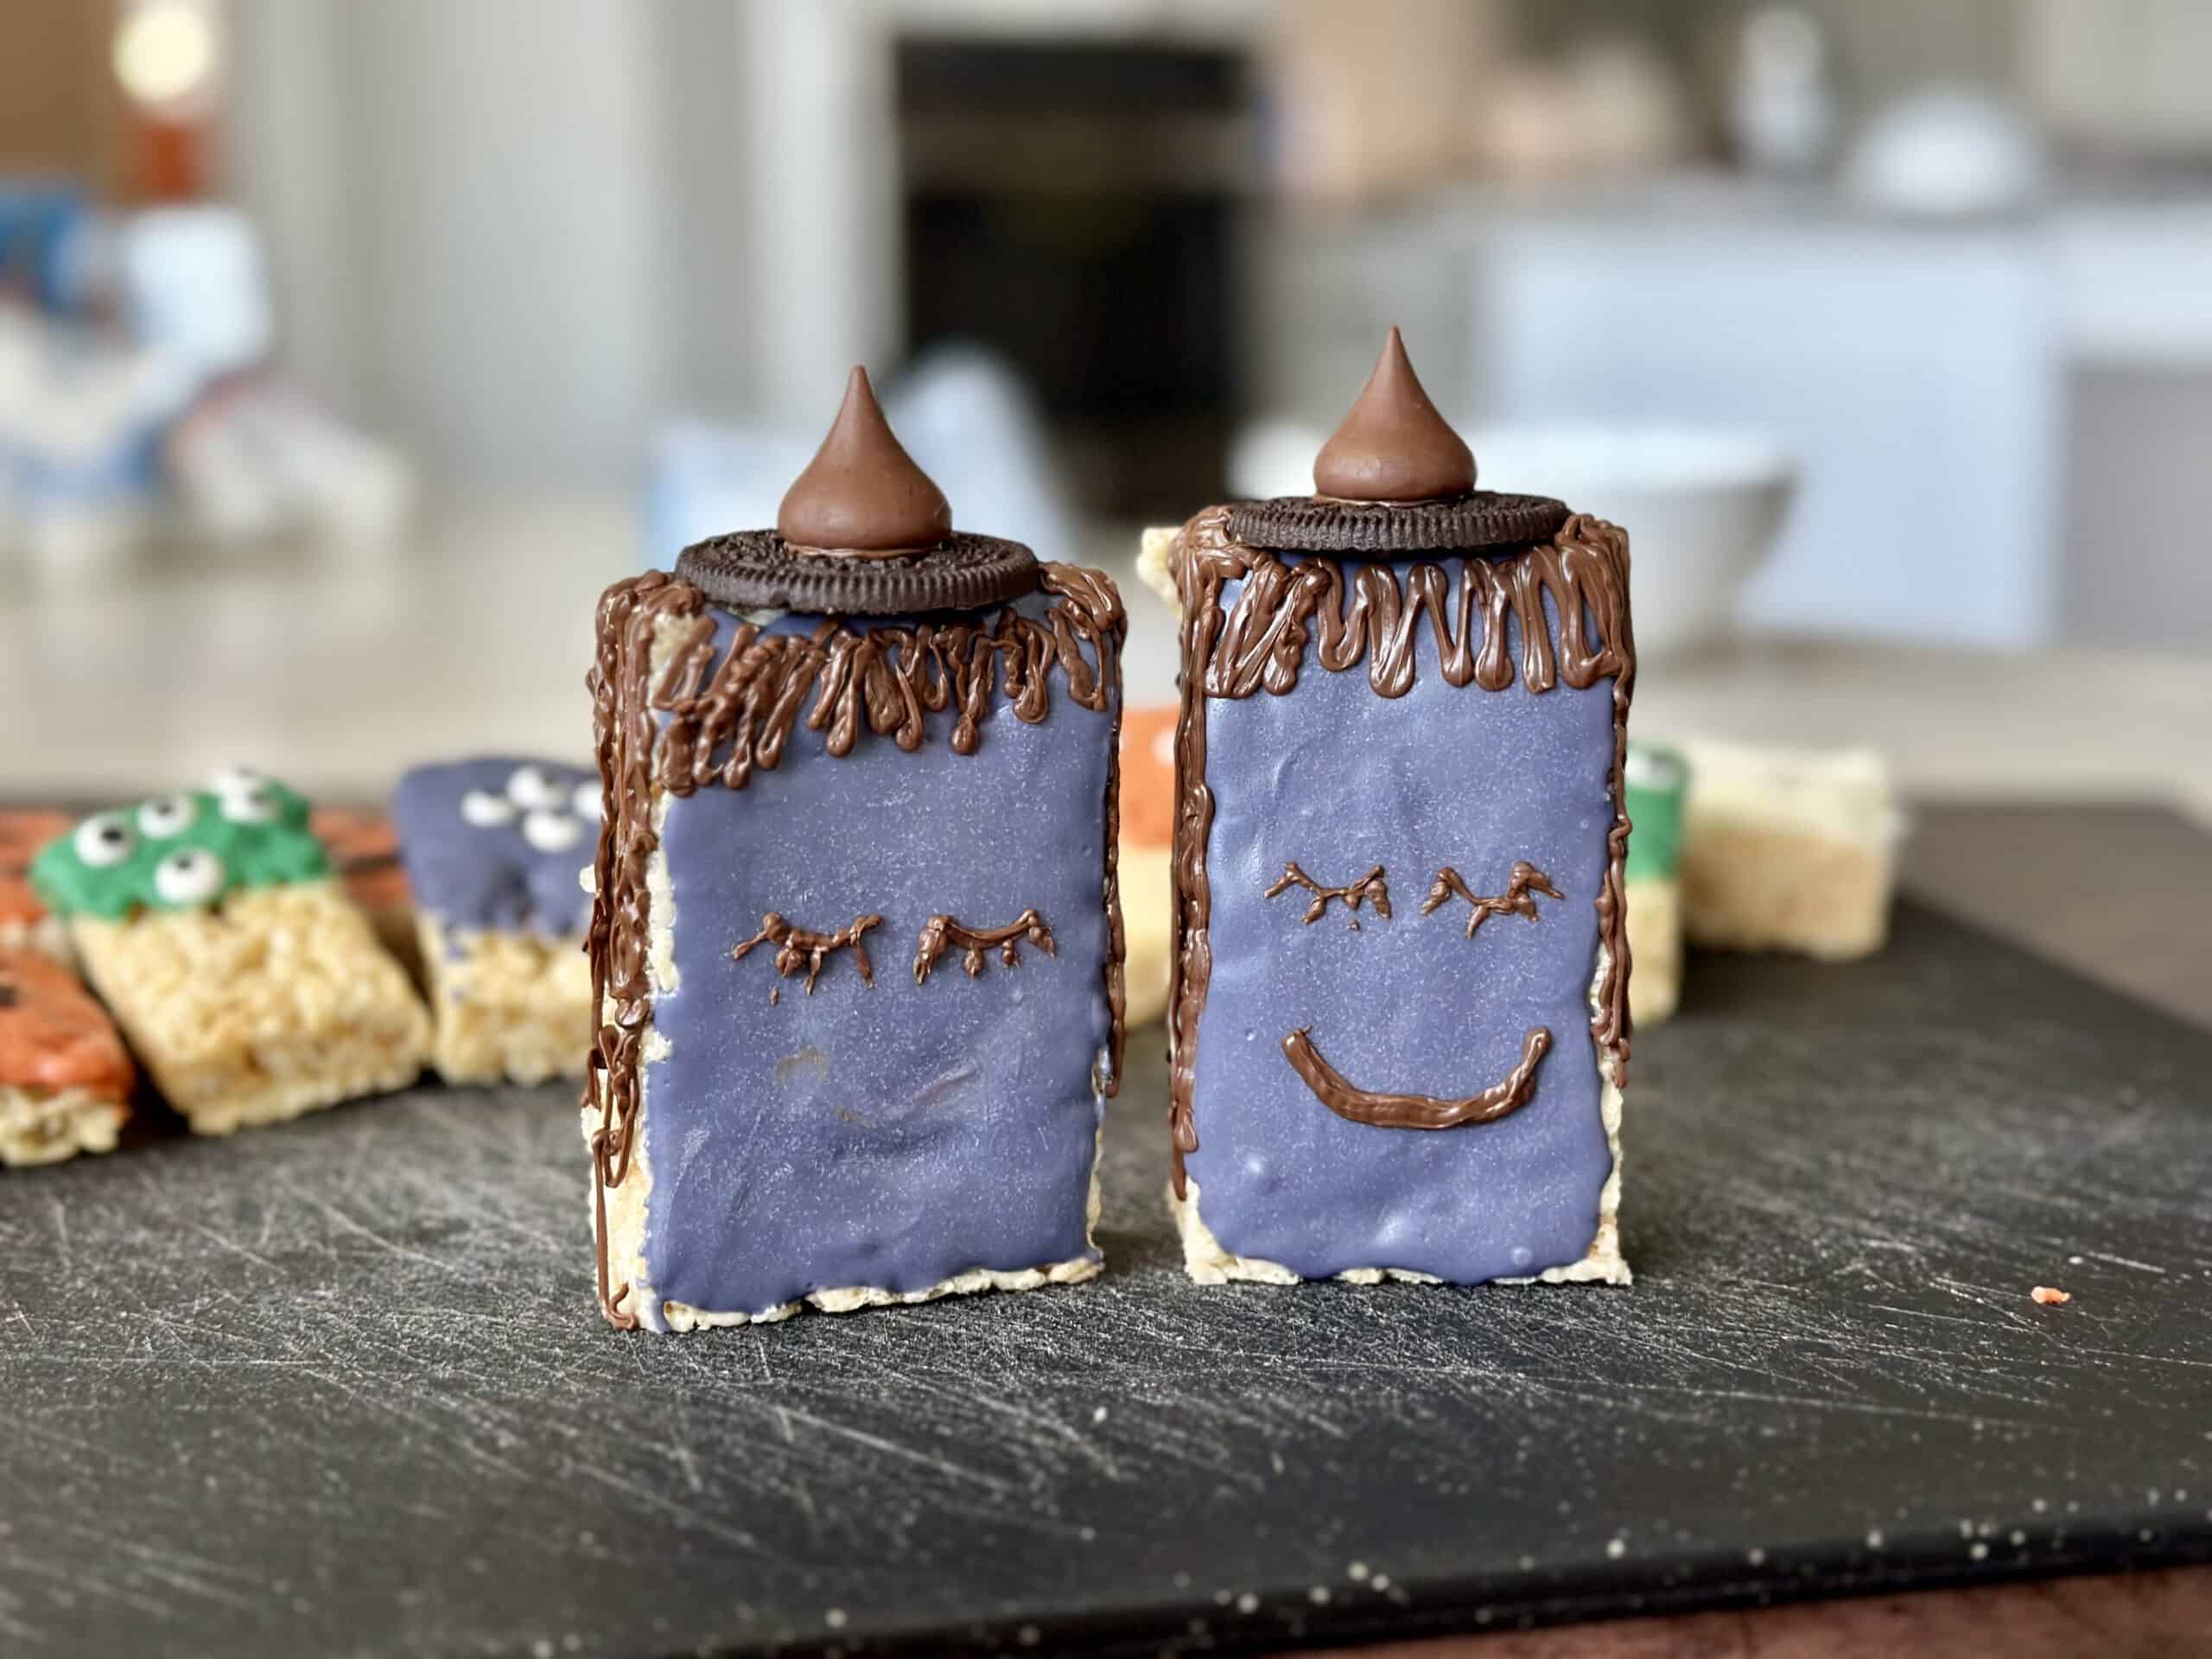
For these little cuties you will need: peanut butter cups or chocolate kisses and a single Oreo cookie to create the witches hat. After you add the base coat of chocolate, stand the Rice Krispie treat up so you can add the Oreo and chocolate kiss to make the hat. Then use colored chocolate to add on the rest of the witch's face.
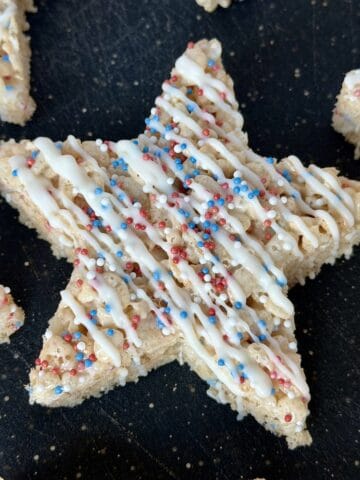
Candy and Sprinkles Treats

For a more hodge podge vibe that is quick and delicious, let's just get a lot of festive candies and sprinkles on top. After you make the basic Rice Krispie treat recipe, pour a layer of whatever chocolate coating you want to use. That could be dark chocolate, white chocolate, or a fun color. When the melted chocolate layer is still melted sprinkle on candy corns, mini m&ms, and colorful sprinkles.
How to Store Rice Krispie Treats Until its Time to Eat Them
All you need to do is save these fastive Halloween treats in an airtight container. They cane kept out on the counter at room temperature and do not need to be refrigerated.
Homemade Rice Krispies Treats Final Thoughts
I hope you make these festive treats and have so much fun with your kids. The fall season is such a special time of year. I hope you have a stress free great time making these and eating them. Whatever you do, don't worry if they don't come out perfectly. Everyone will love them.

Halloween Rice Krispie Treats
Equipment
- Large Pot
- disposable piping bags
- baking dish
- parchment paper optional
Ingredients
- 6 cups Rice Krispie Treats
- 5 cups marshmallows
- 4 tablespoon unsalted butter
- ½ cup orange chocolate melts
- ½ cup green chocolate melts
- ½ cup white chocolate melts
- ½ cup dark brown chocolate melts
- 16 candy eyes
- halloween sprinkles
Instructions
- Spray a 9x13 glass baking dish and set aside.
- Preheat a large pot to medium and melt 4 tablespoons of butter.
- Once the butter is melted, add all 5 cups of marshmallows and stir to coat with the melted butter. Continue to stir the marshmallows until they are completely melted.
- Turn off the heat and quickly stir in the Rice Krispies. As soon as they are evenly mixed, pour the Rice Krispie and marshmallow mixture into your dish.
- Cover the Rice Krispie treats with a piece of plastic wrap and really press into them to create a very even thickness all the way through. Having a nice even layer will give you uniform Rice Krispie Treats. Let them rest for at least two hours before cutting and decorating.
Decorating
- Run a knife around the edges of the Rice Krispie Treats and flip over onto a cutting board. Cut out 12 equally sized treats. Trim the edges so they have straight sides all the way around.
- Place chcolate melts in a microwave safe dish and heat in mocrowave on "MELT" setting. Stir vigorously every 30 seconds until the chocolate is smooth. The more you stir, the less heat you will have to use overall. Be careful and watch the temperature because if the chocolate gets too hot, the sugar will burn and you'll have to start over.
- Transfer the colors to plastic piping bags for the decorations. If the chocolate hardens, you can place the piping bag back in the microwave for 30 seconds to re-melt the chocolate.
- For the mummy, start with a small section ⅓ of the way from the top of your treat and pipe out a little chocolate. Stick on two candy eyes in the stripe. Use the white chocolate to pipe on stripes, making some horizontal and some diagonal to look like a wrapped mummy.
- For Frankenstein, start with a lot of green chocolate for the base. When you have piped out a thick layer, tap the Rice Krispie Treat down on your work surface to smooth it out. Put on two candy eyes. Use the dark chocolate to give him hair and a mouth that looks like stitches. Dip two mini marshmallows in chocolate and secure to the sides for the "bolts."
- For the Jack-O-Lantern, start with a base layer of orange. Tap it on the counter to smooth it out. Using melted dark chocolate in a piping bag, give it triangle shaped eyes, nose, and Jack-O-Lantern mouth.
- They are ready to serve or you can bag them up for later. They travel well.
Notes
Nutrition
Jessica l Tao of Spice says
These are so fun! My kids and I love Rice Krispie treats. I think we'll make these for our Halloween feast this Saturday!